Zone Photos
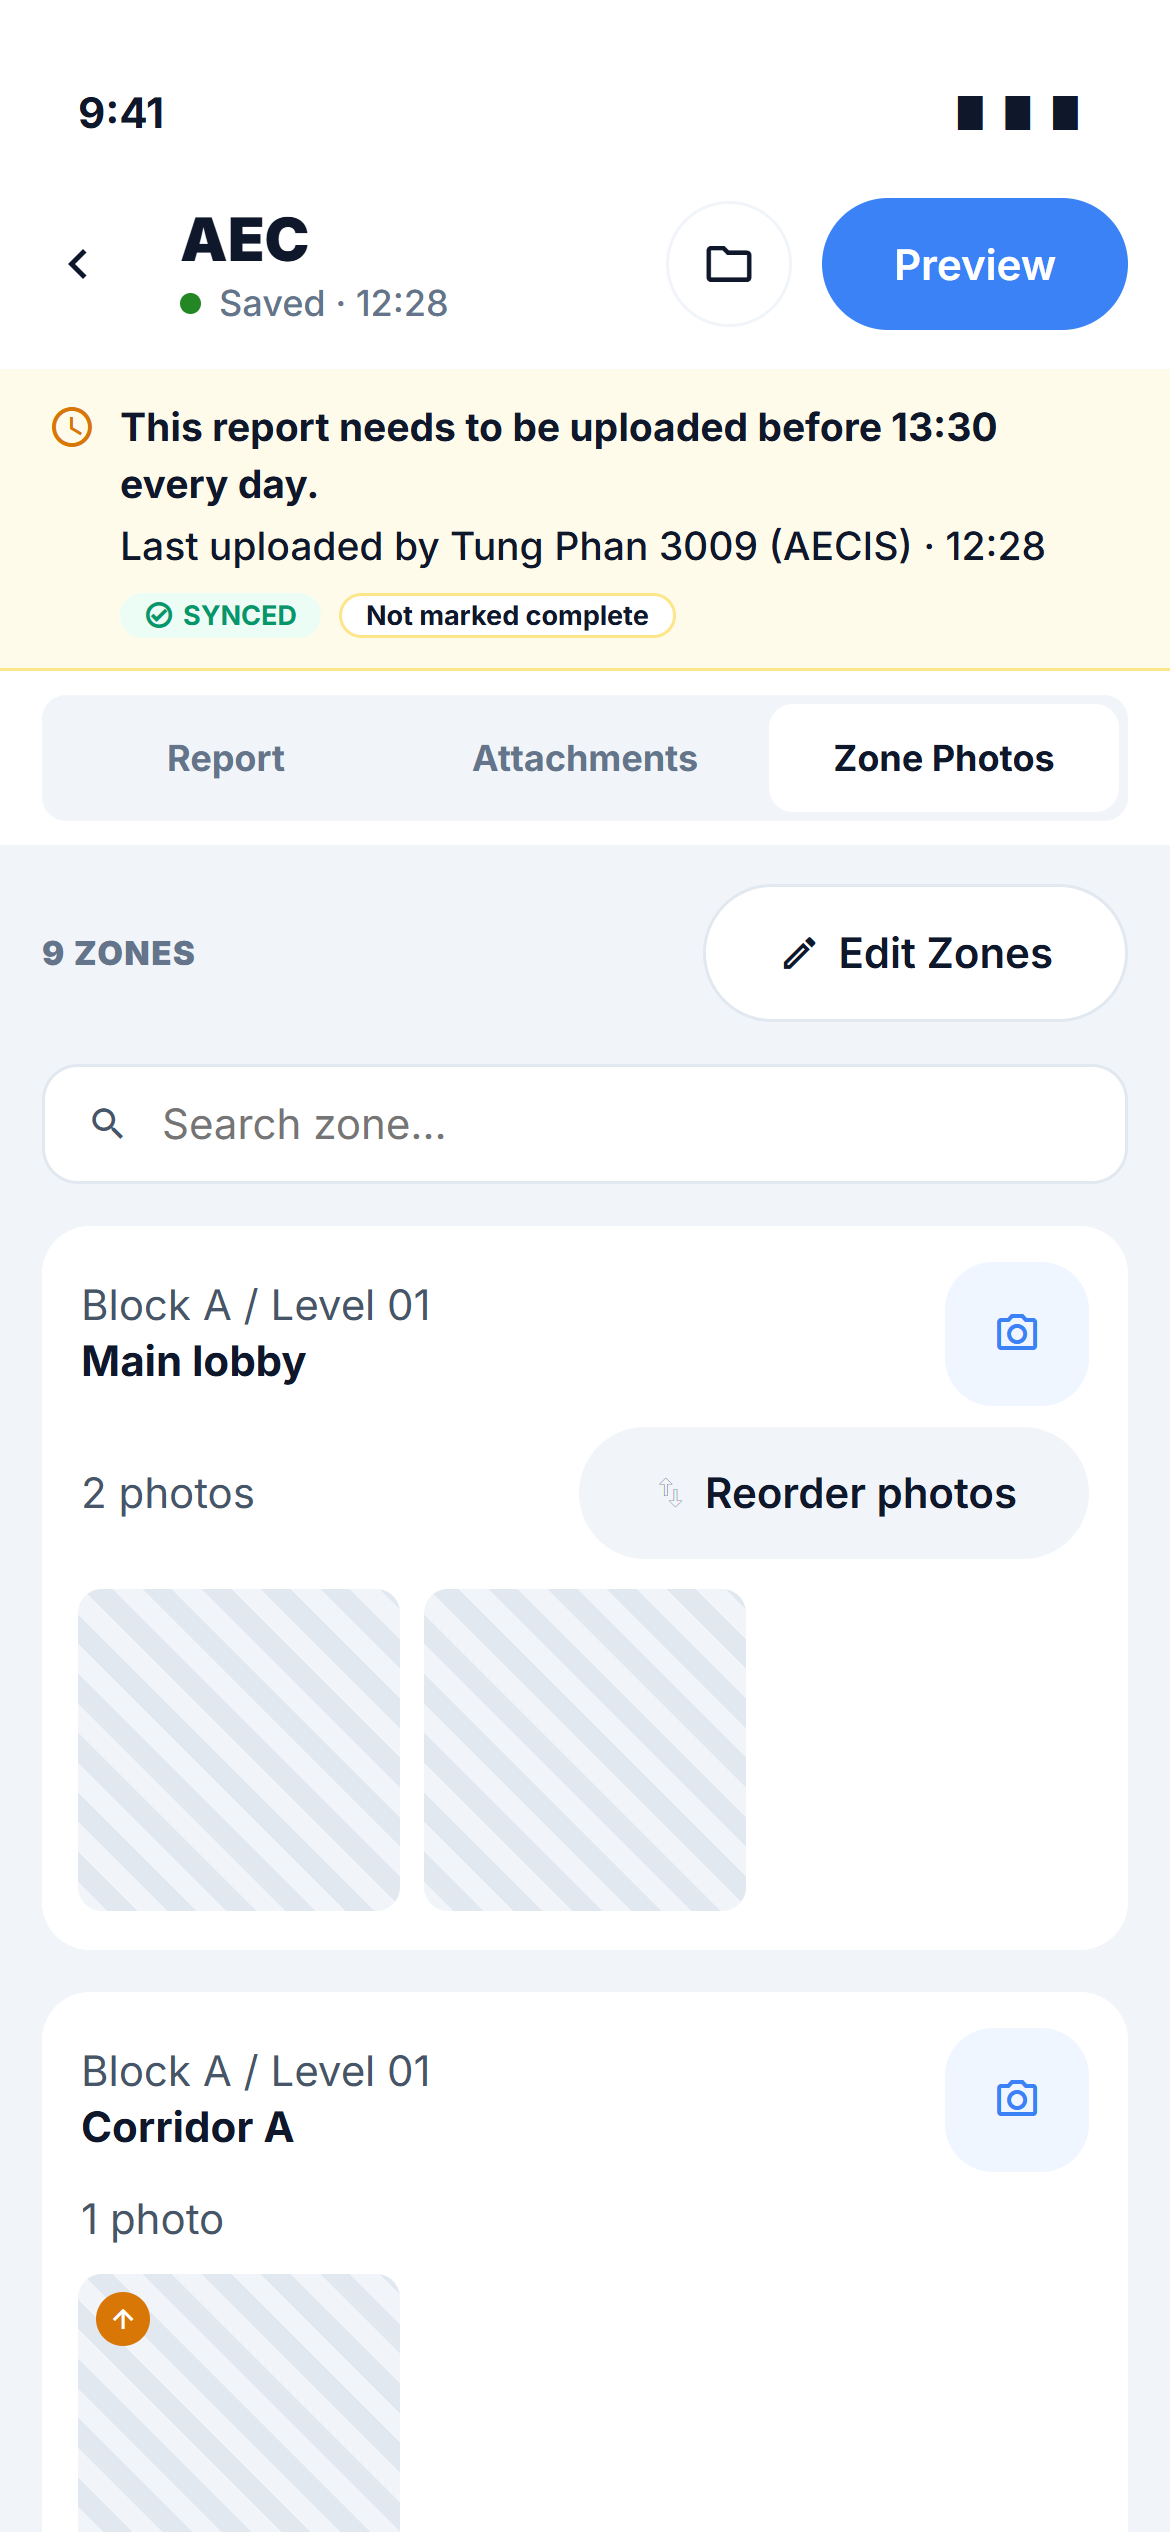
Site photos are filed against a zone, because the compiled report prints them zone by zone under each zone's heading. The Zone Photos tab shows one section per zone currently on the report, in the order they will be printed — and on mobile every section has its own camera button.
The tab
The heading area shows the zone count (9 ZONES) and the single action Edit Zones (pencil). With more than a handful of zones a search box narrows the sections by any part of the zone's path.
Each section shows:
- the zone's parent path in small text and its leaf name in bold —
Block A / Level 01over Main lobby; - a photo count, or No photos yet;
- a camera button on the right;
- the photos as square thumbnails, six at a time with a +N tile when there are more;
- a Reorder photos link once the zone holds more than one photo.
A queued photo — one taken offline and not yet uploaded — carries a small ⇡ mark on its thumbnail.
When the report has no zones at all, the tab shows an empty state: No zones yet — add a zone from Edit Zones ▸ Select Zones, then capture photos into it.
What a zone is
Exactly what it is on web: a node in the project's shared DTag tree, offered according to the zone scope set in Project Settings ▸ Daily Report. Zone names show as leaf only in the sections and the viewer, and as the full path in the Select Zones picker, where two leaves can share a name.
The zone scope itself cannot be changed from the phone.
Adding photos
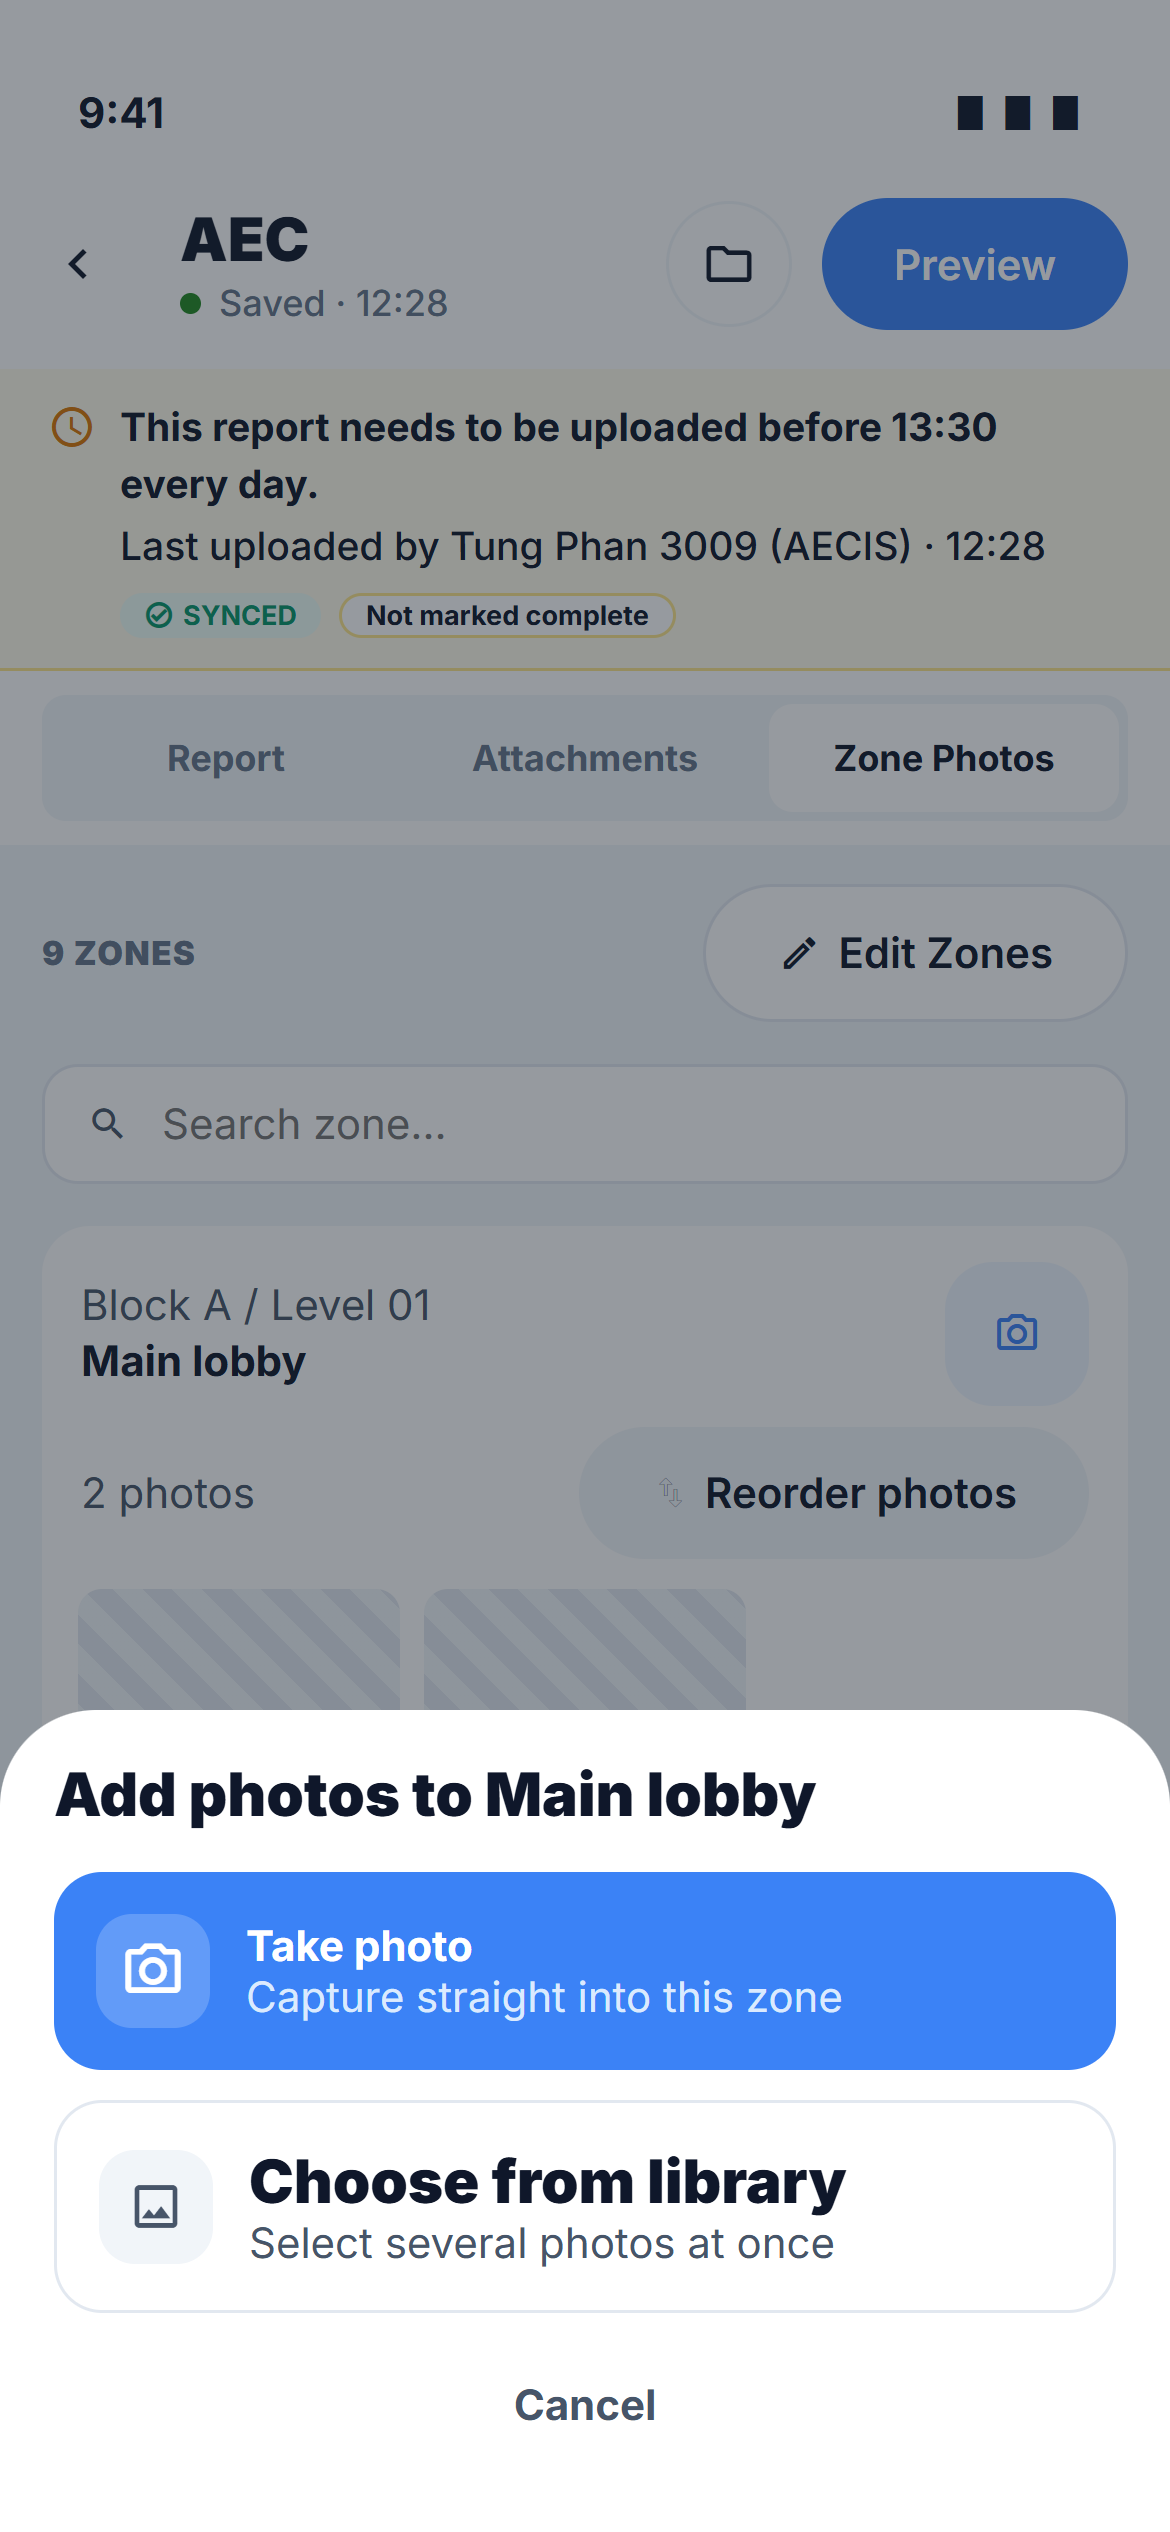
Tap a section's camera button. A sheet titled Add photos to Main lobby offers two routes:
| Route | What happens |
|---|---|
| Take photo — Capture straight into this zone | Opens the in-app camera for a burst, described below |
| Choose from library — Select several photos at once | Opens the device library with multi-select; Add (4) files the selection into the zone |
The camera always belongs to the zone whose button you tapped. There is no global camera and no hidden "current zone" — you cannot photograph into the wrong section by accident.
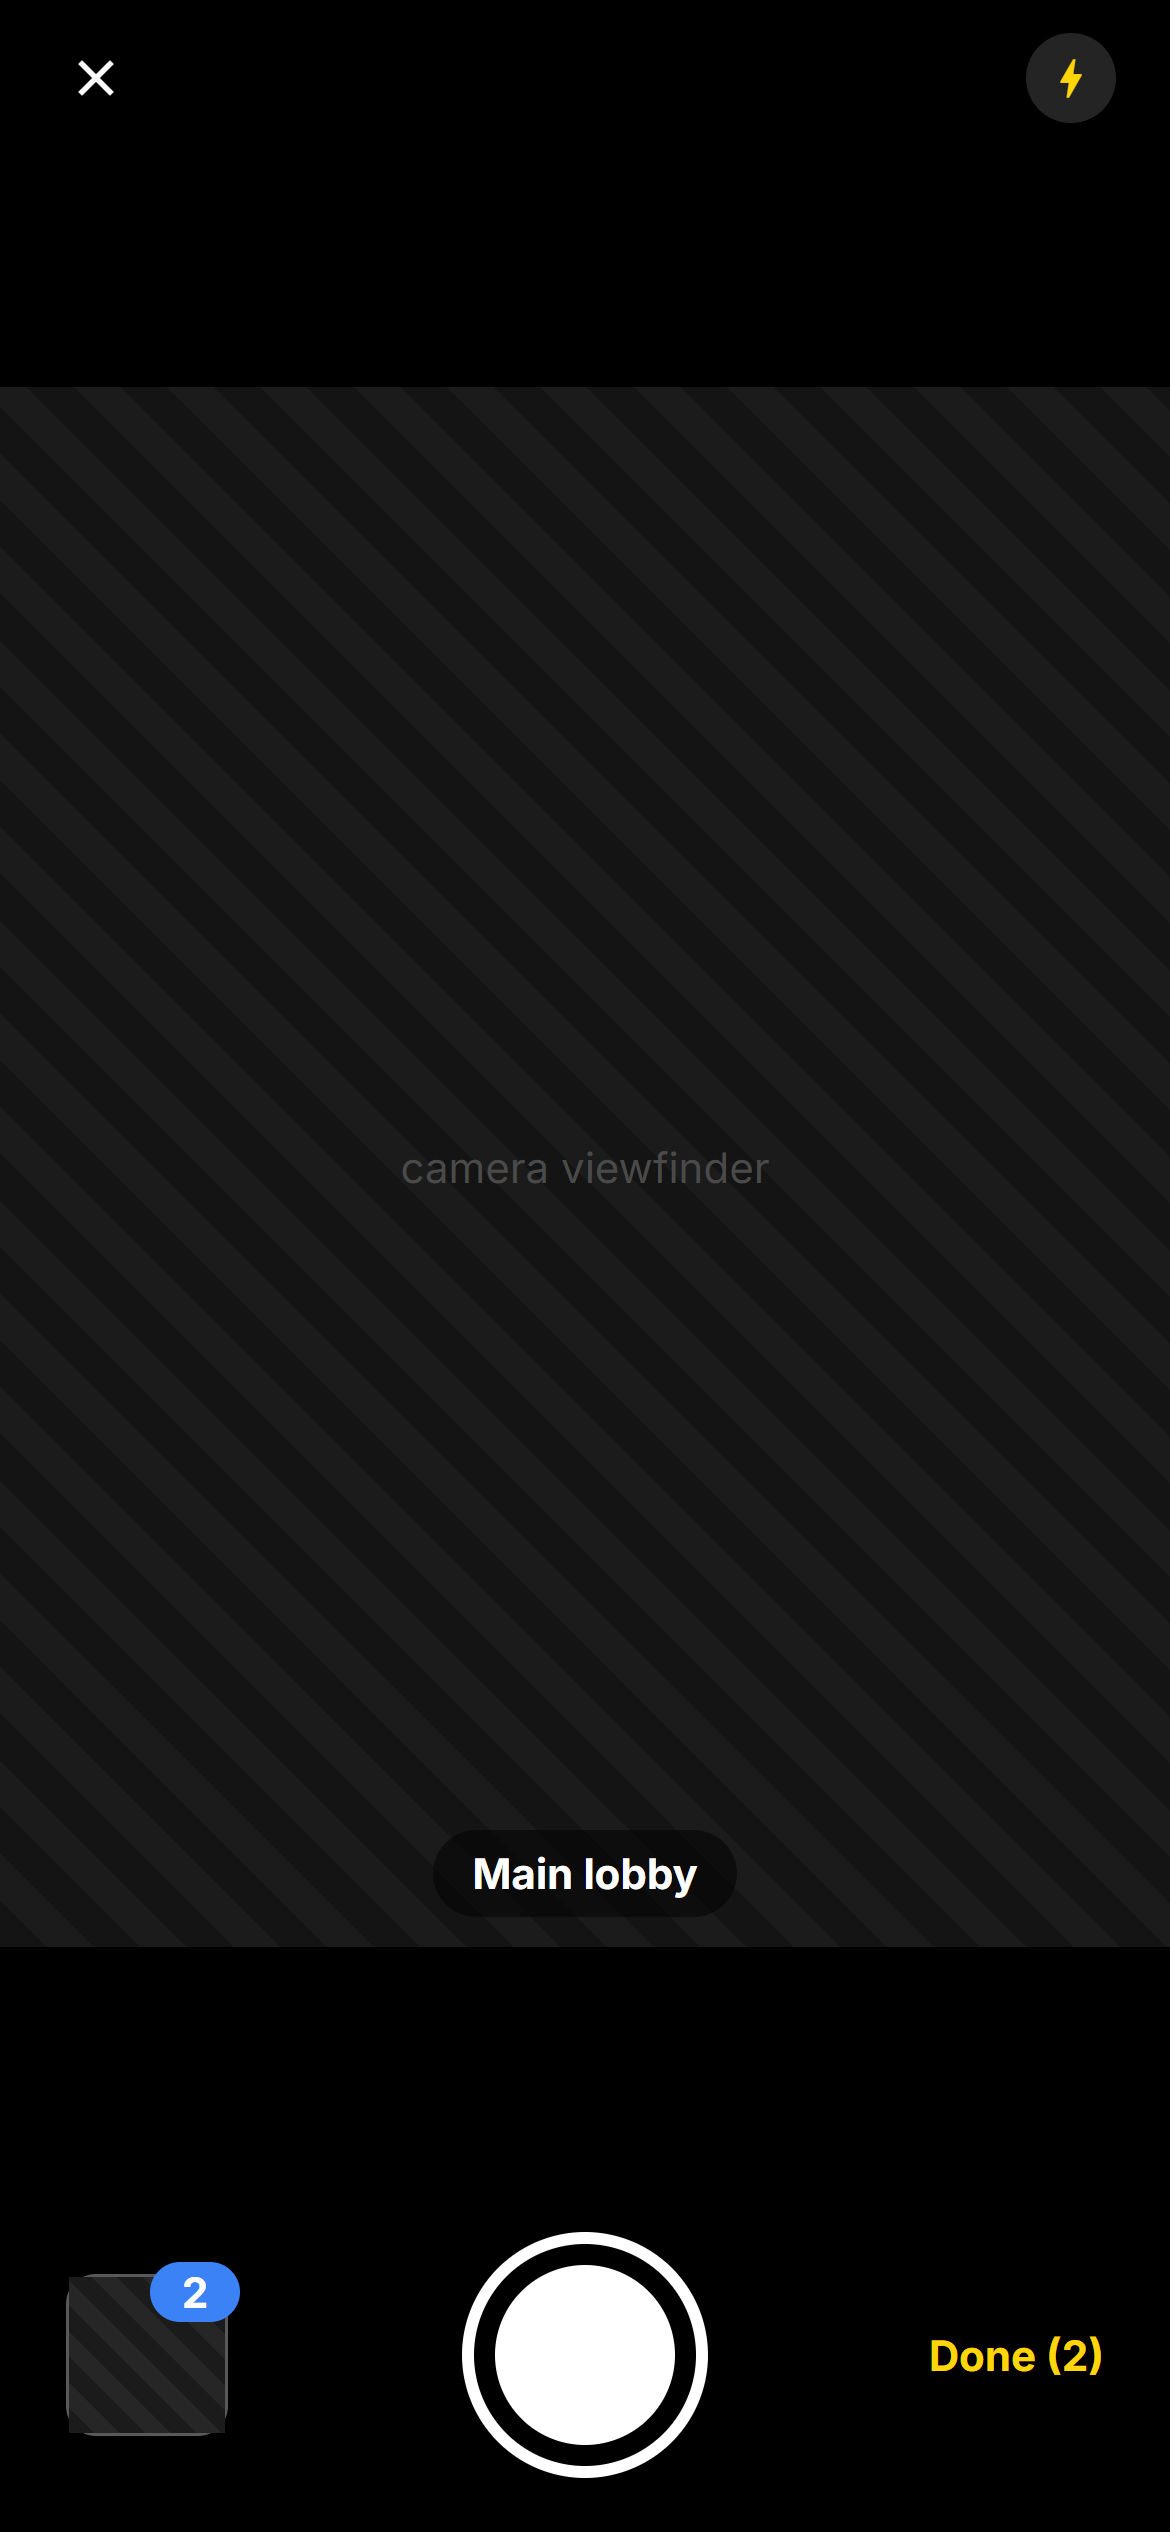
The burst camera
- Shoot as many frames as you need; the roll in the corner counts them.
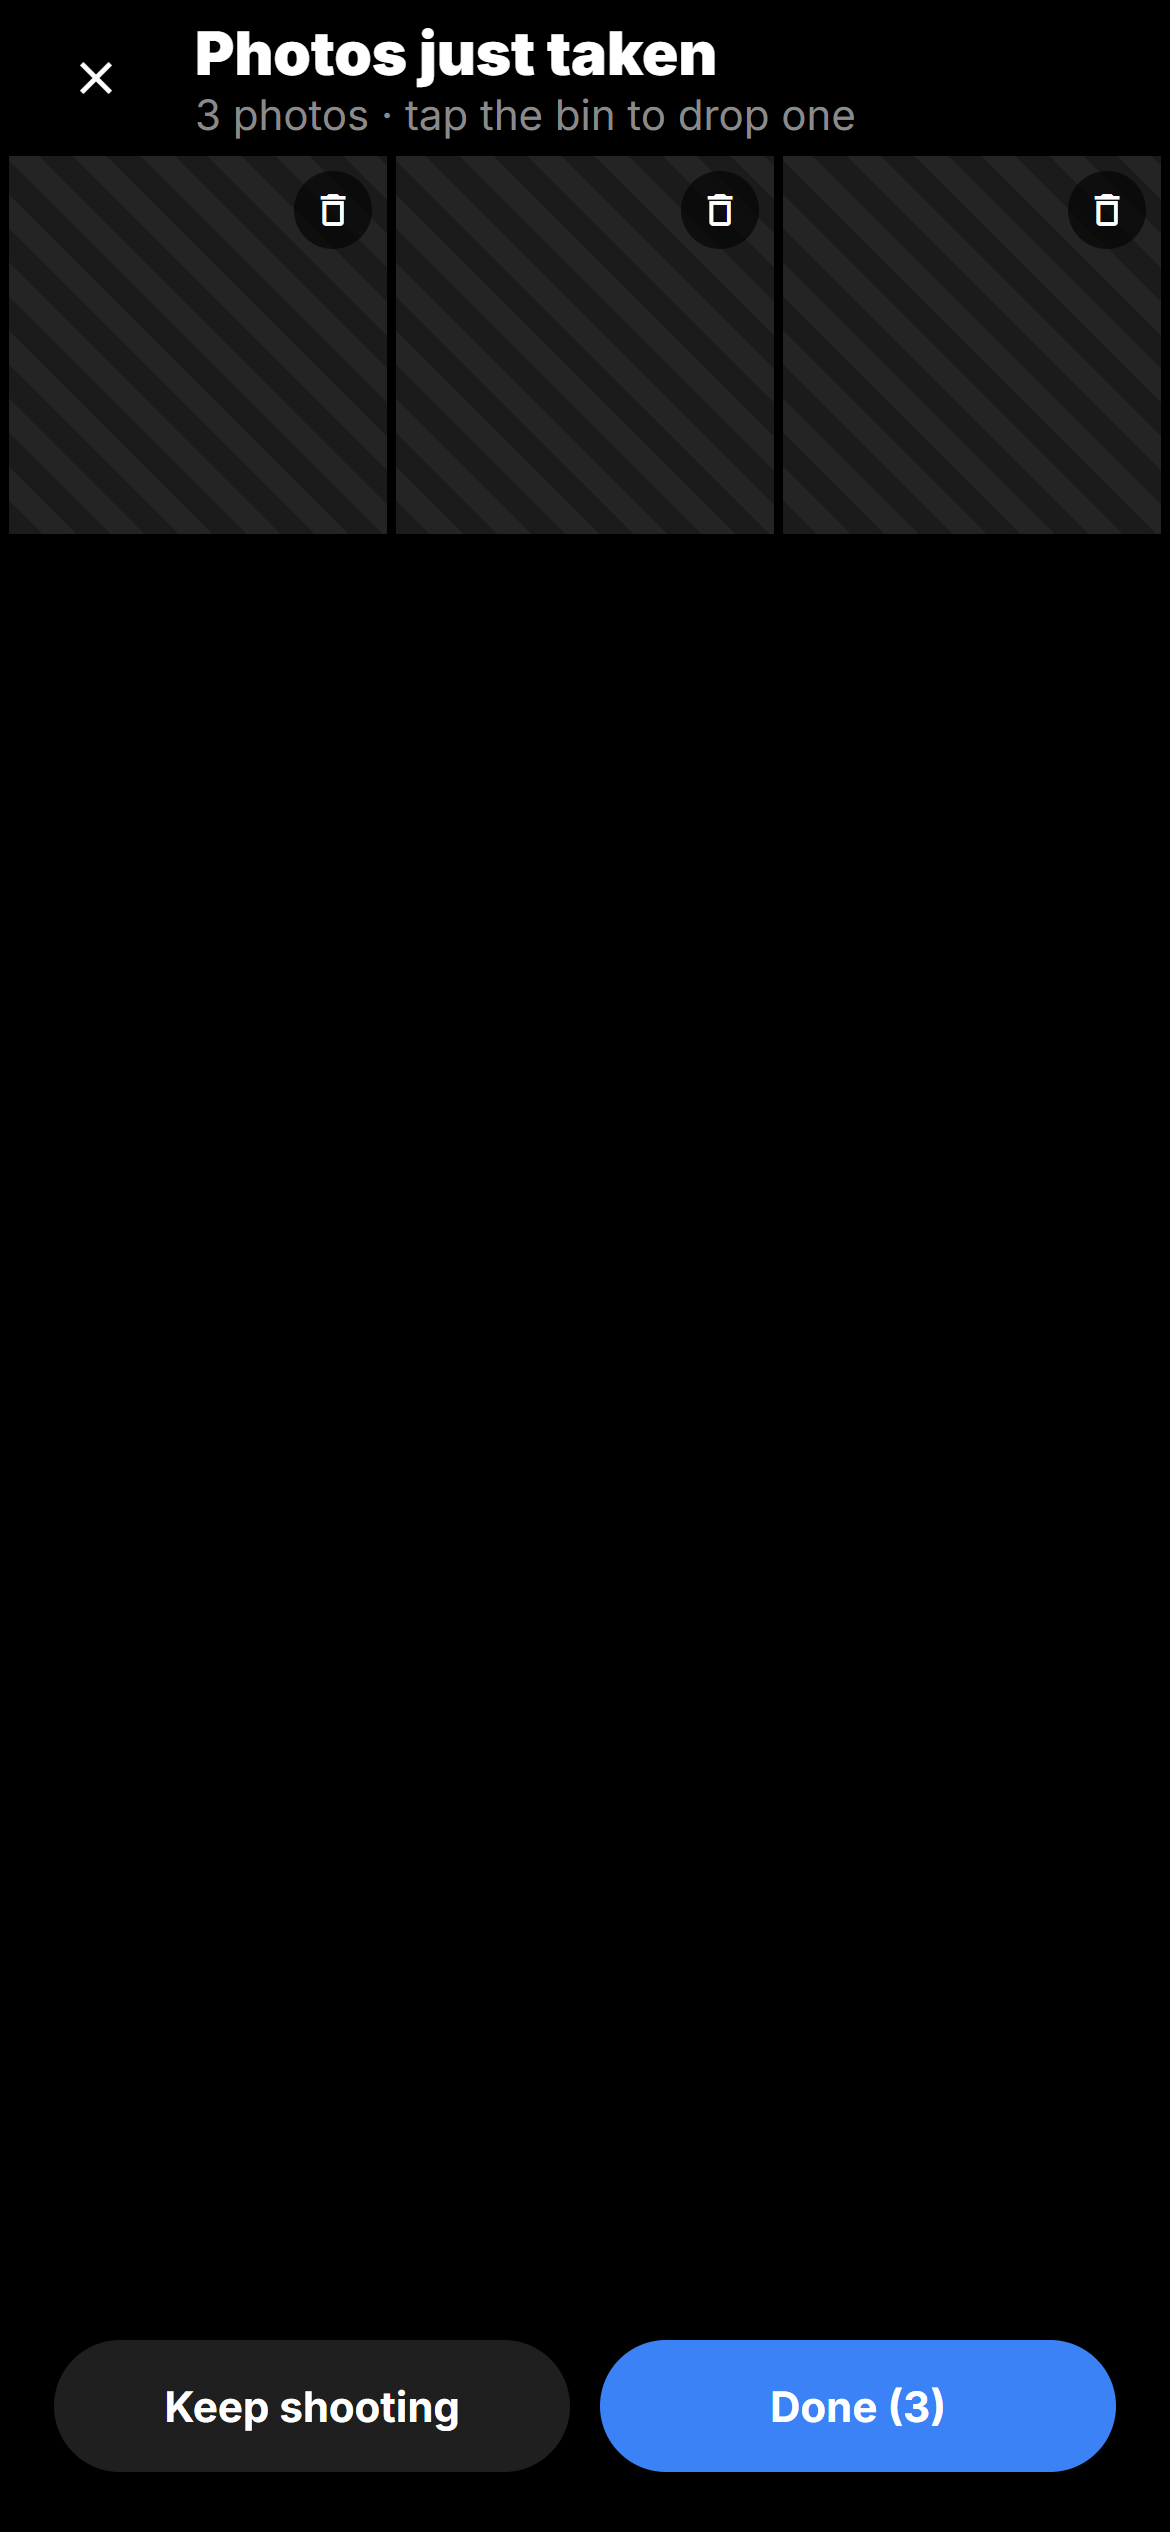
- Tap the roll to review the burst — 5 photos · tap the bin to drop one — and drop the ones you do not want. Keep shooting returns to the viewfinder.
- Done (5) files the whole burst into the zone in one go. ✕ cancels and discards the burst.
While in the camera, Library lets you add device photos into the same burst before confirming.
A new photo has no caption — the compiled report prints «No caption» for it until you write one in the viewer.
Offline, the burst is saved on the device and shown with the ⇡ mark; the toast reads Saved on device — waiting to sync.
The photo viewer
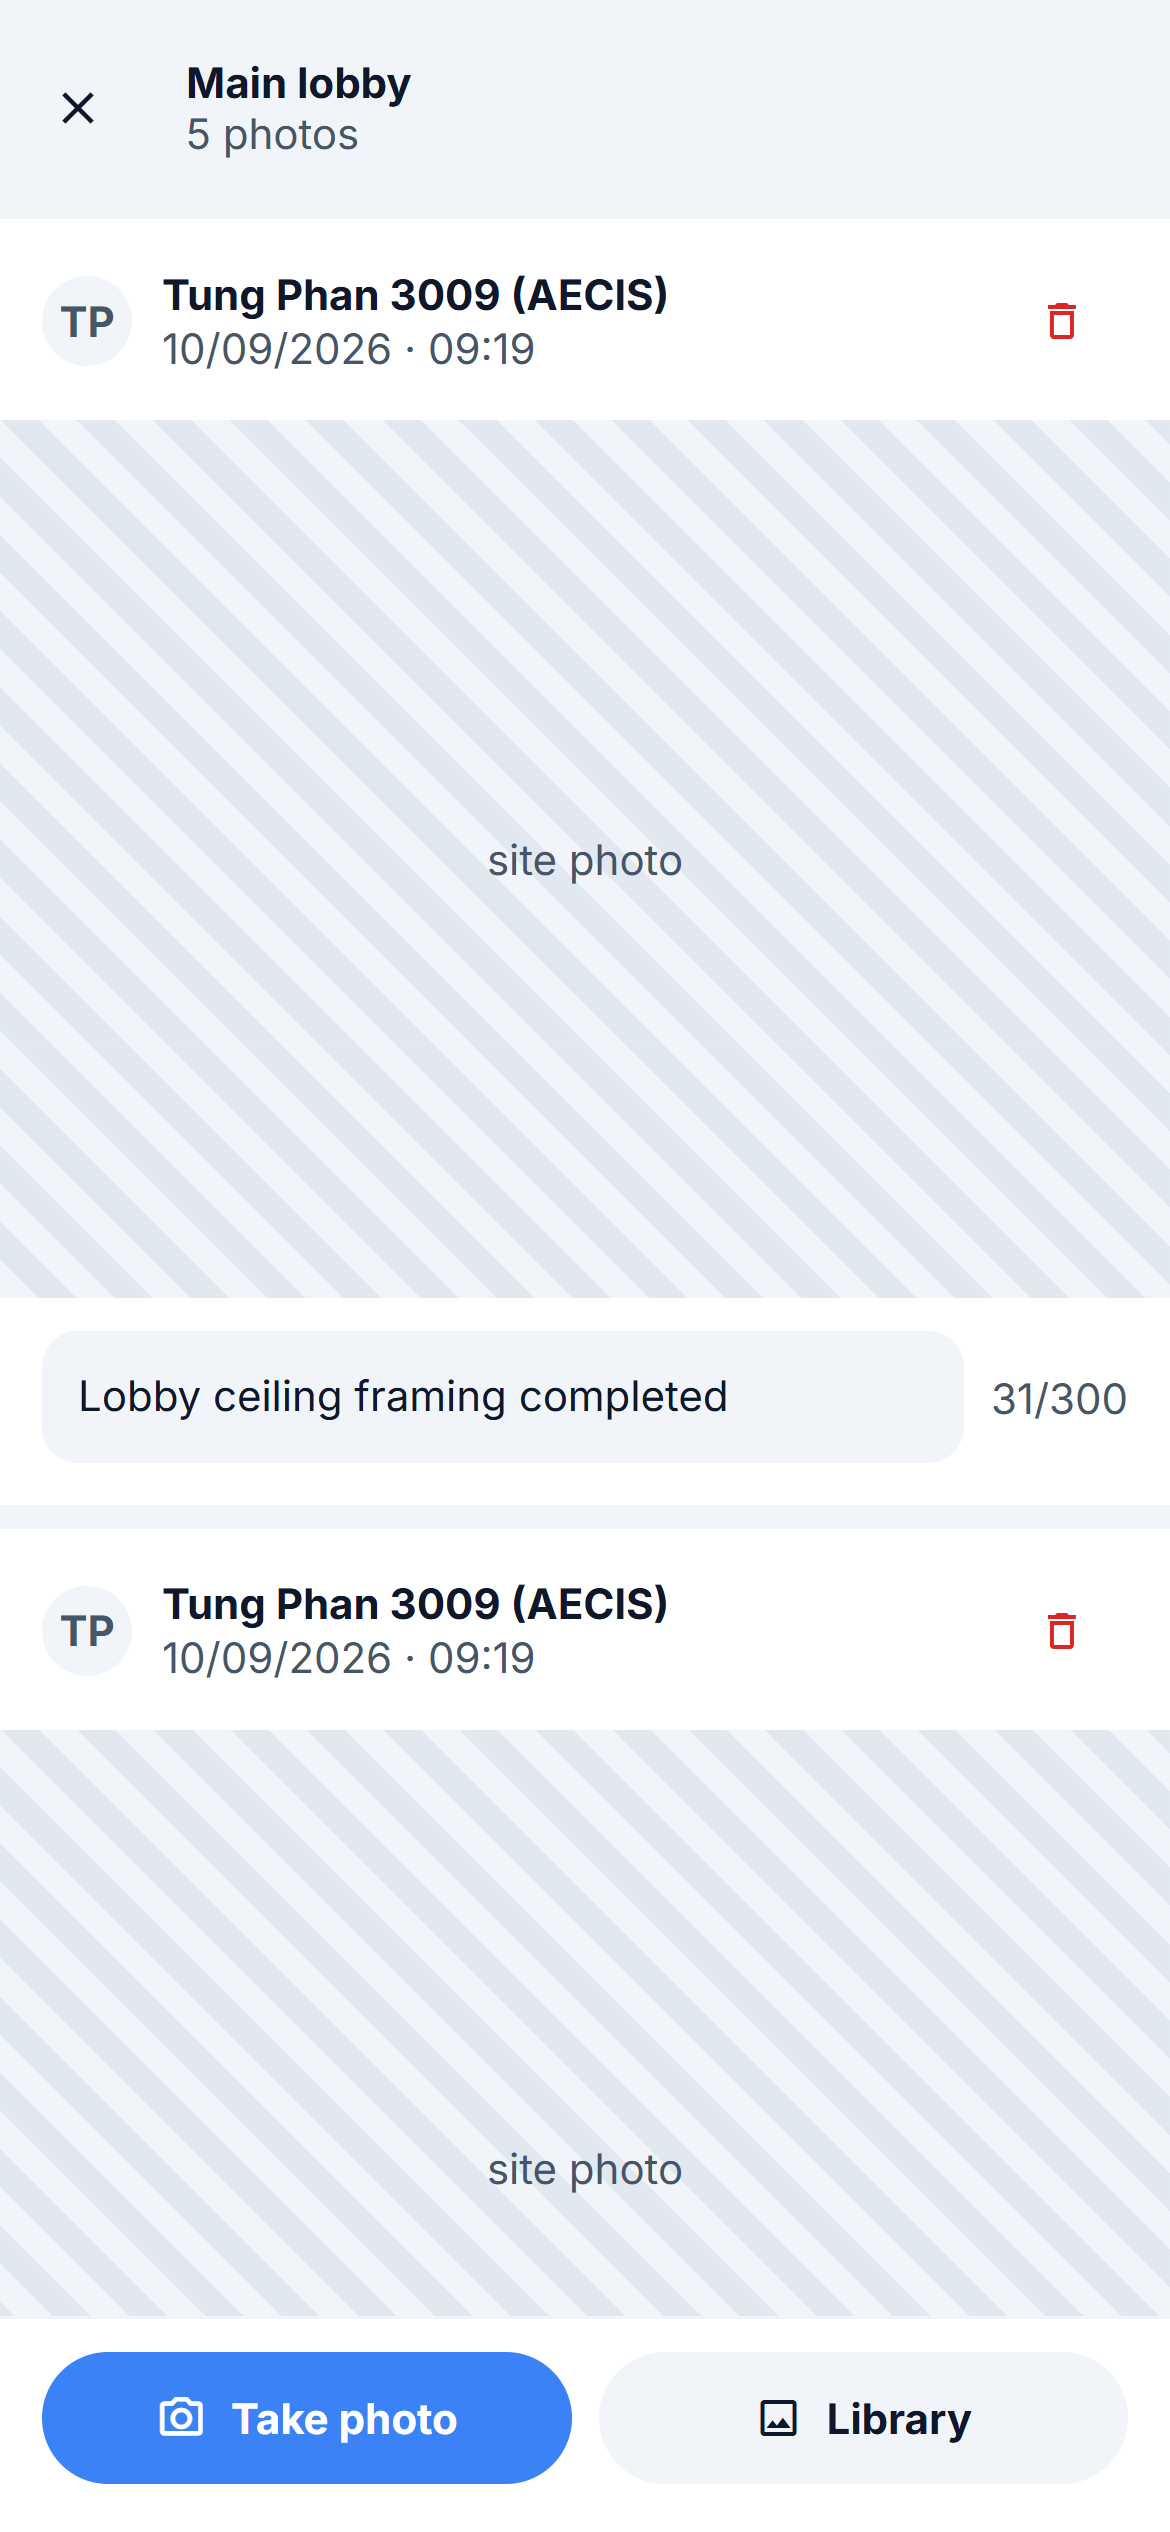
Tap a thumbnail to open the zone's photos as a scrolling feed — the zone's leaf name and photo count in the header, then one card per photo. The feed is scoped to the zone you opened, matching the way the compiled report groups photos.
Each card shows:
| Element | Notes |
|---|---|
| Uploader and time | Read-only — Tung Phan 3009 (AECIS) · 10/09/2026 · 09:19 |
| PENDING badge | Shown while the photo is still waiting to upload |
| Caption | Type directly under the photo, up to 300 characters with a live counter. Saved as you type |
| Delete (bin) | Removes the photo — no confirmation and no undo |
At the bottom of the feed, Take photo and Library add more photos to this same zone without leaving the viewer.
The web viewer has a Zone selector that moves a photo to another zone. The mobile viewer does not — a photo stays in the zone it was shot into. To file it elsewhere, delete it and shoot or pick it again in the right zone.
Sorting photos in a zone
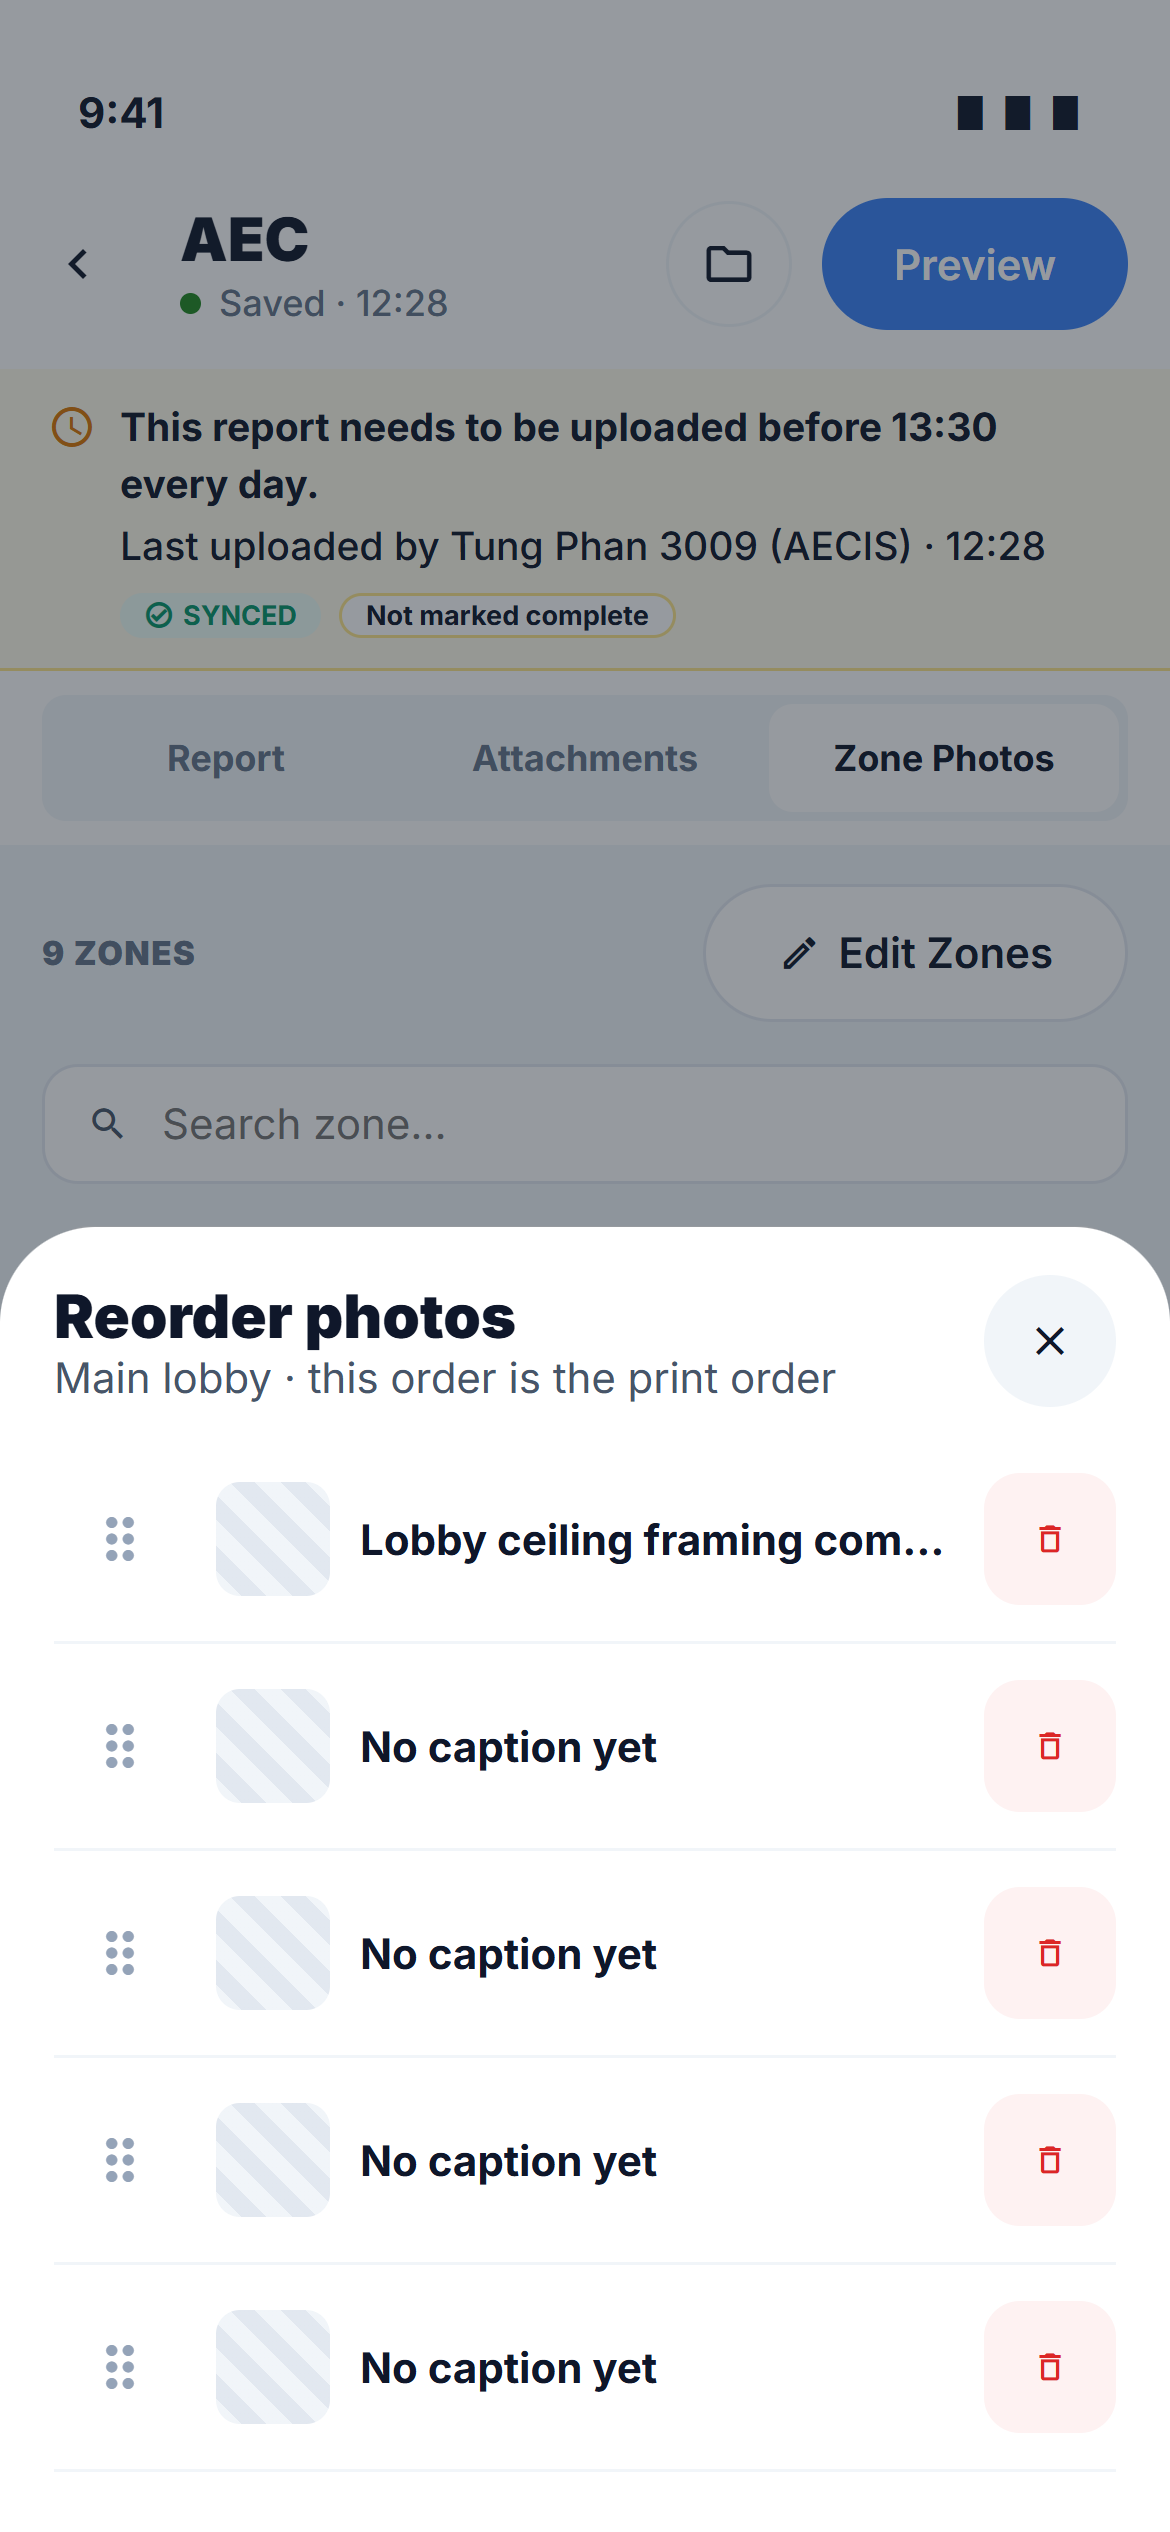
Reorder photos under a section opens a sheet listing that zone's photos by caption — Main lobby · this order is the print order.
- Press and hold the ⠿ grip and drag a row; it follows your finger and the others make room.
- Or use the ▲ / ▼ buttons to move a row one step.
- The bin deletes the photo from here too.
If the reorder cannot be saved, the list snaps back to its previous order.
The Edit Zones sheet
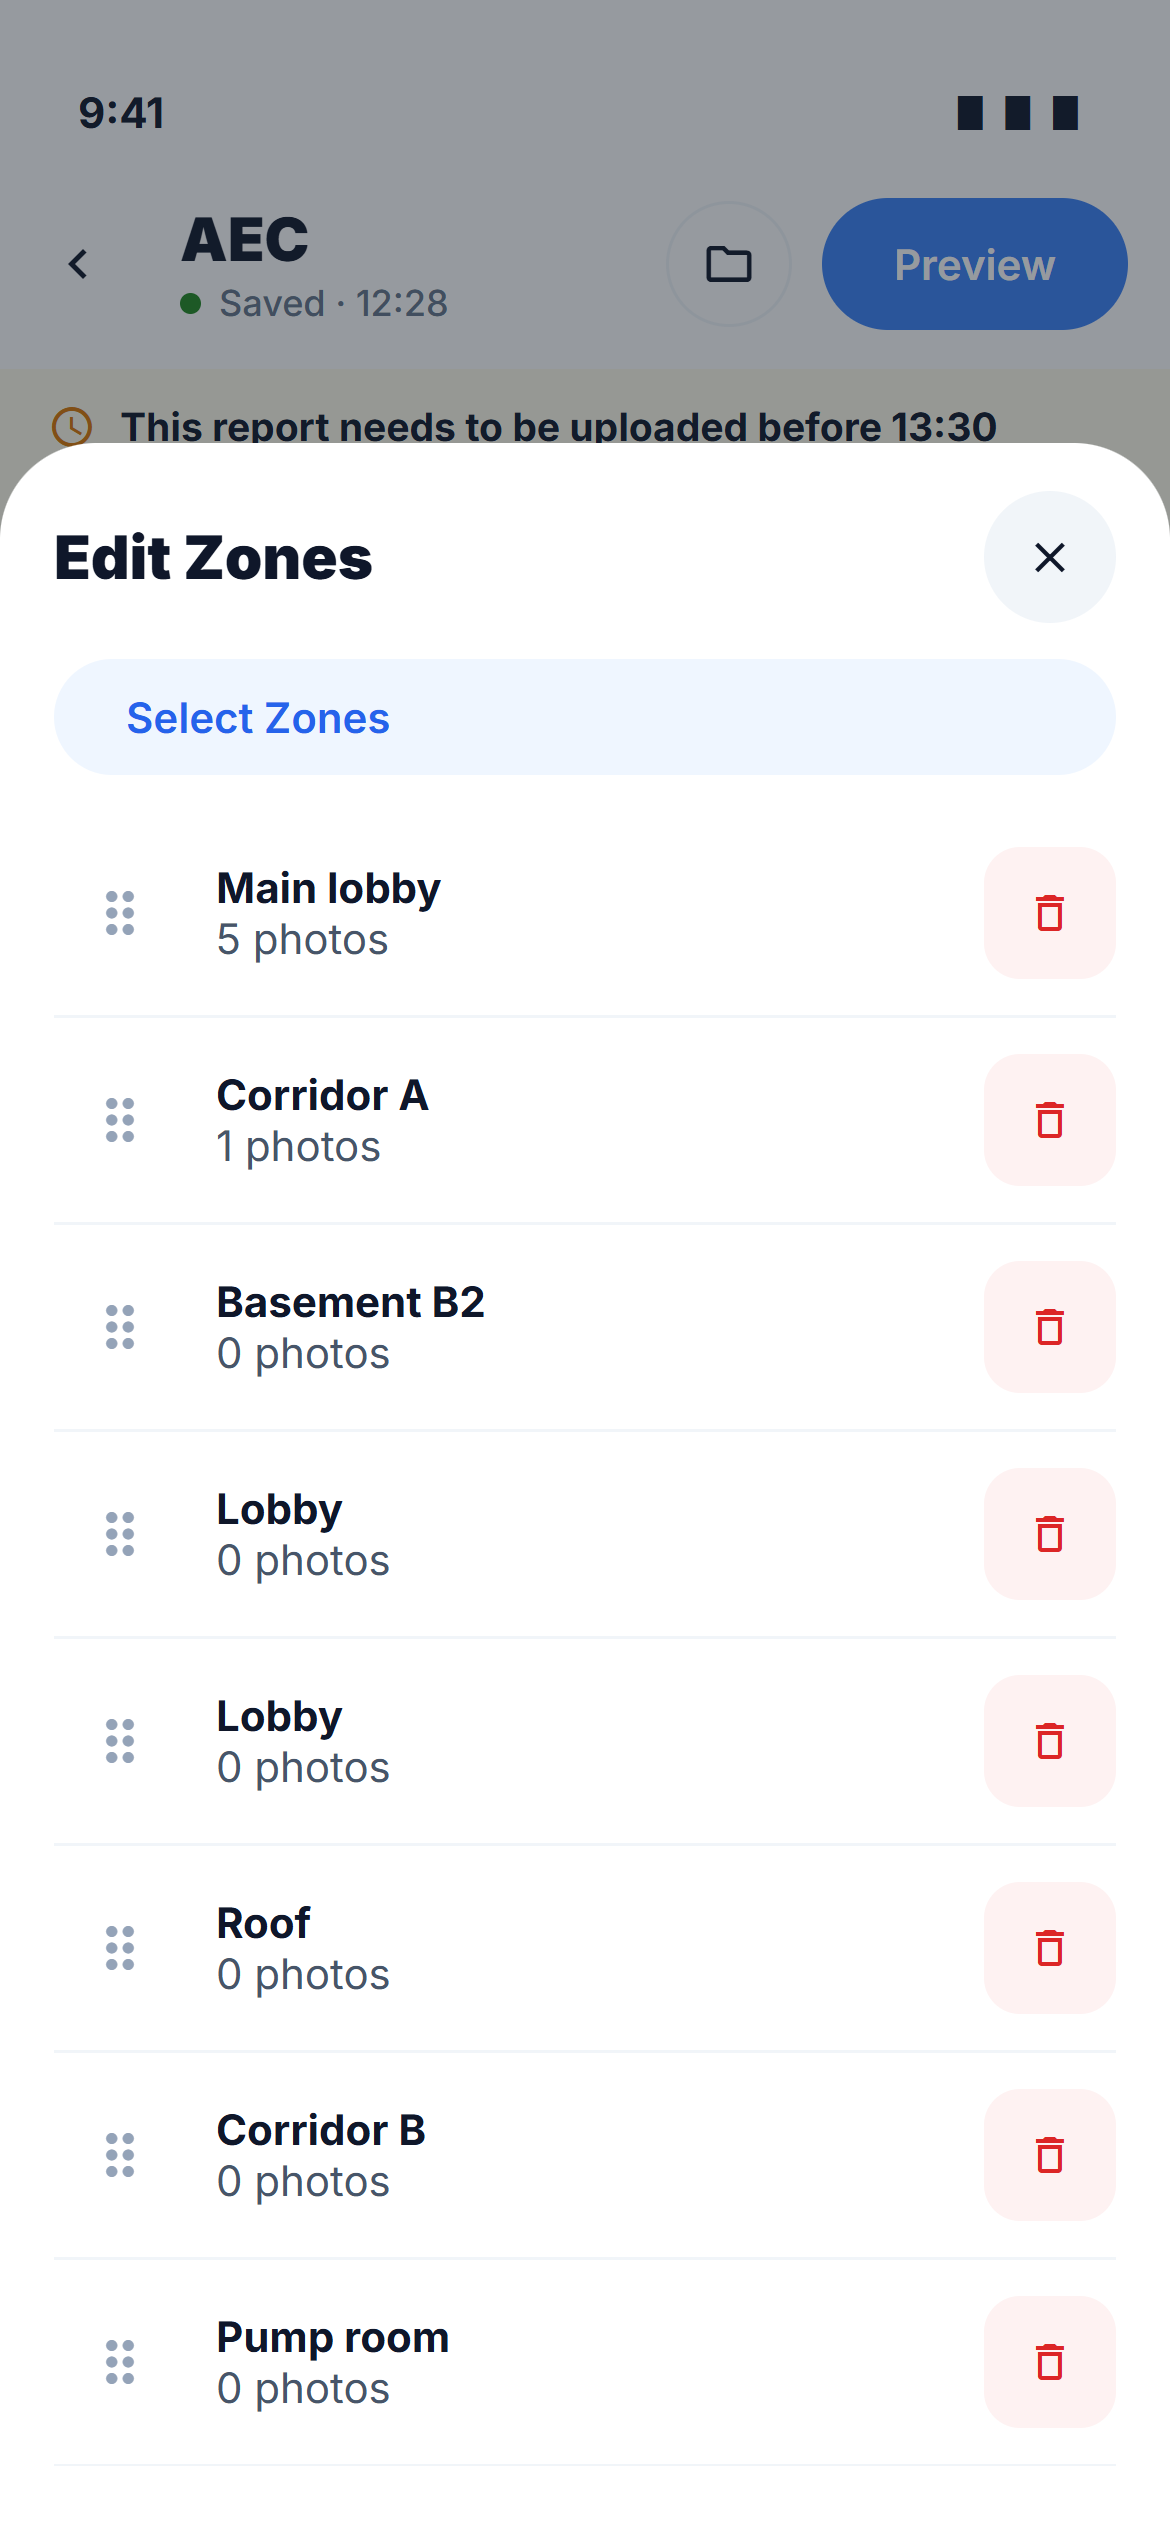
Edit Zones opens a bottom sheet (not a side panel) with the report's zone list in print order and a Select Zones button on top.
Every action writes to the report immediately — there is no Done or Save button. Close the sheet with ✕ when you are finished.
Each row carries a ⠿ grip, the zone's leaf name, its photo count, and a bin.
| Action | How |
|---|---|
| Reorder | Press and hold the grip and drag, or use ▲ / ▼. This is the only place a zone's print order changes |
| Remove | Tap the bin — one tap, no confirmation, even if the zone holds photos |
Removing a zone takes its section off the report only. Its photos are kept, still tagged to the zone, and reappear in their original order if the zone is added back. The DTag node is never deleted.
The Select Zones picker
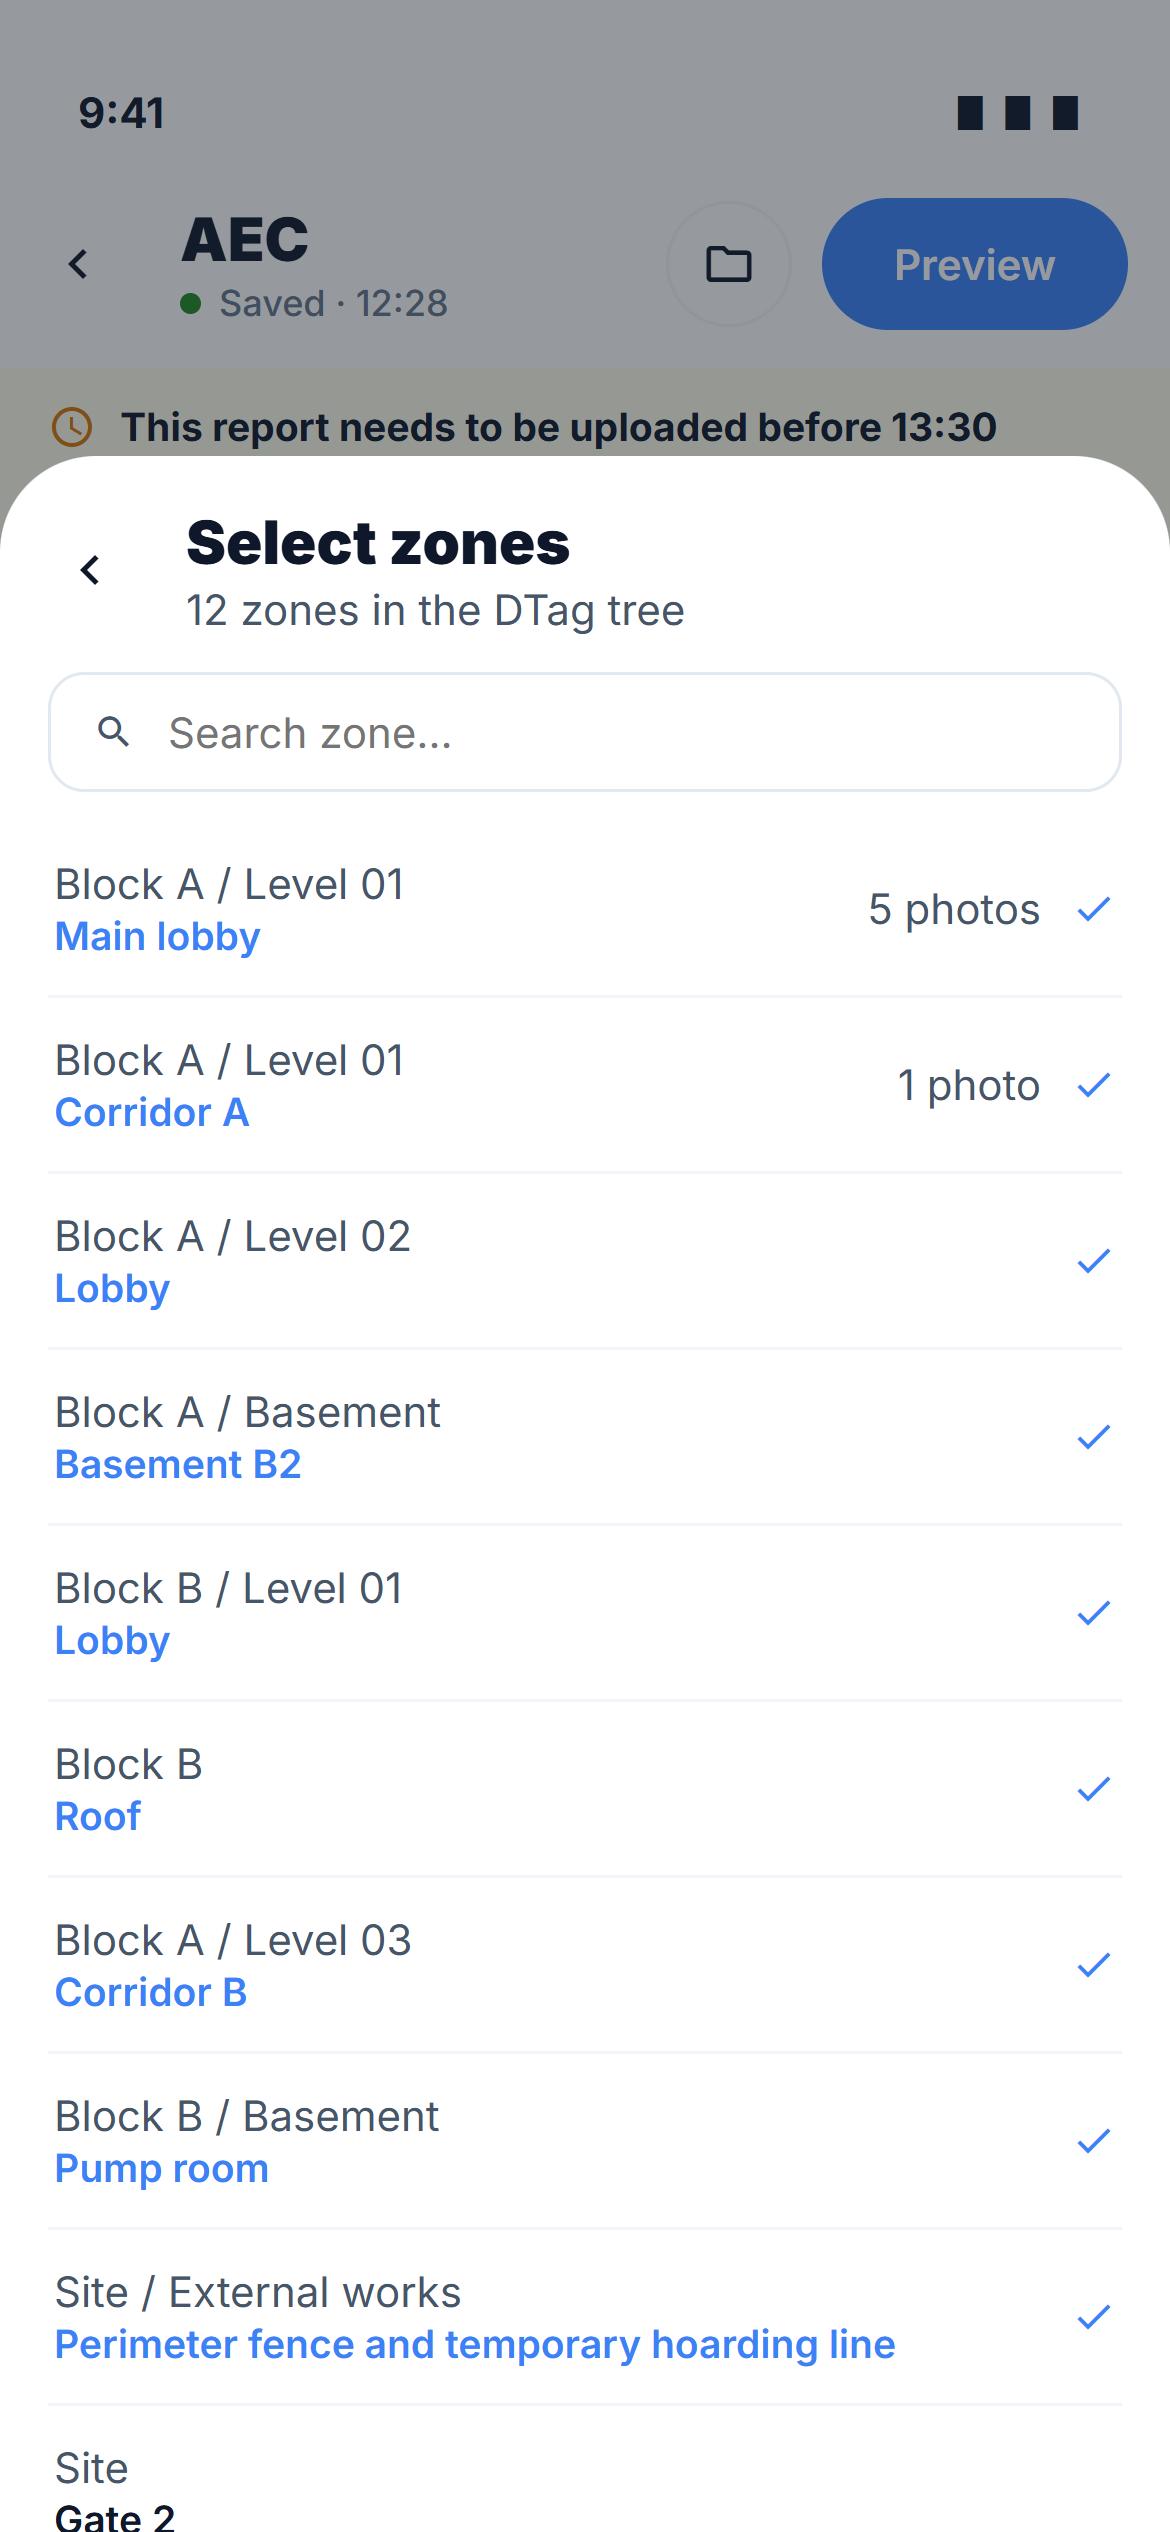
Opened from Select Zones inside Edit Zones — the only way to add a zone to the report. It is nested one level: Back returns to Edit Zones.
- Lists the zones the project's scope allows, as full paths — 12 zones in the DTag tree — with a search box.
- Every row is checkable. Zones already on the report show a tick and their photo count; tapping a ticked row removes it (photos preserved), tapping an unticked row adds it at the end of the print order.
- Changes apply instantly, row by row.
The web picker has a pencil that creates, renames and moves DTag nodes. The phone only selects from the tree — creating a new zone is done on the web.
Deletions are immediate
Deleting a photo and removing a zone both happen on the tap, with no confirmation dialog and no undo — the same rule as on web. Removing a zone is safe (the photos stay); deleting a photo is not.