Workflow Actions
Move an issue through its lifecycle with seven actions: Open (automatic on creation), Complete, Close, Cancel, Reassign, Update, and Reopen.
Who can do what
| Role | When Opened / Reopened | When Done | When Closed / Cancelled |
|---|---|---|---|
| Creator | Close, Complete, Update, Reassign, Cancel, Edit Inline | Close, Reopen | Reopen |
| Assignee | Complete, Update, Reassign | — | — |
| Administrator | All actions | Close, Reopen, Edit Inline | Reopen, Edit Inline |
- "Creator" and "Assignee" include users in the same stakeholder organization as the creator/assignee.
- If you belong to both groups, the Creator's rights take priority for display.
- If you belong to neither group and are not an administrator, no action buttons are shown.
The most important actions appear as quick buttons on the action bar (e.g. Close and Complete for the creator); the rest sit under the More menu. Each action has a question-mark icon with a short explanation you can read without triggering the action.
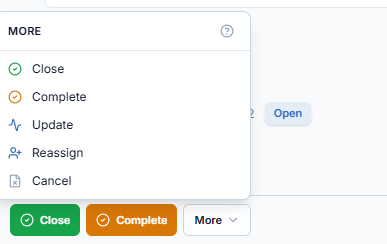
The action dialog
Every action opens a panel sliding in from the right (~640 px wide) with a consistent layout:
- Header — action icon and title (color-coded), the issue number, a Private toggle for this specific action, and a close button.
- Body — a Note field (rich text with
@mentions), a Distribution block (pre-loaded from the issue's list), and Attachments (drag & drop). The Private toggle sits in the dialog header. - Footer — a Notify Recipients via Email checkbox and the confirm button, enabled only when required fields are filled.
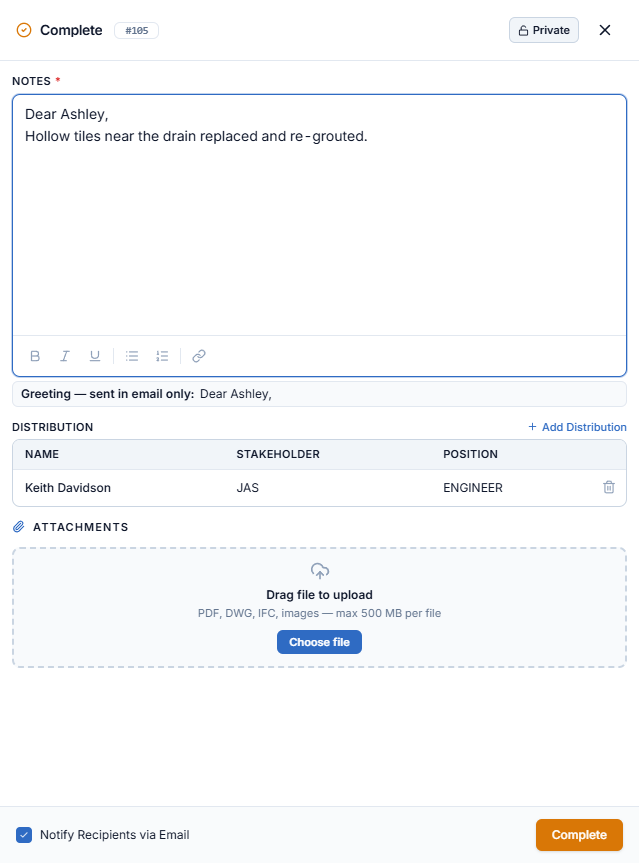
- Greeting — if the note starts with a greeting such as Dear Ashley,, AECIS shows it under the box as Greeting — sent in email only. It opens the email, but is trimmed from the note saved on the Activity timeline.
- Attachments — PDF, DWG, IFC and images, up to 500 MB per file, attached to this action.
- Notify Recipients via Email — ticked by default; untick it to record the action without sending the email.
- Issue dialogs have no Restricted or Stamp QR button; those exist only on submittal actions.
| Action | Color | Required | Optional | Result |
|---|---|---|---|---|
| Complete | Amber | Note | — | → Done; the resolver is recorded as the user who performed the action |
| Close | Green | Note | — | → Closed; the closed date is recorded |
| Cancel | Red | Cancellation reason | — | → Cancelled (cannot be undone) |
| Reassign | Blue | New assignee + Note | — | Changes assignee; the previous assignee stays in the distribution list |
| Update | Blue | Note | Sub-status, Confirmed Date | Status unchanged; progress recorded |
| Reopen | Blue | Note | New assignee | → Reopened; closed date cleared |
Complete an issue
-
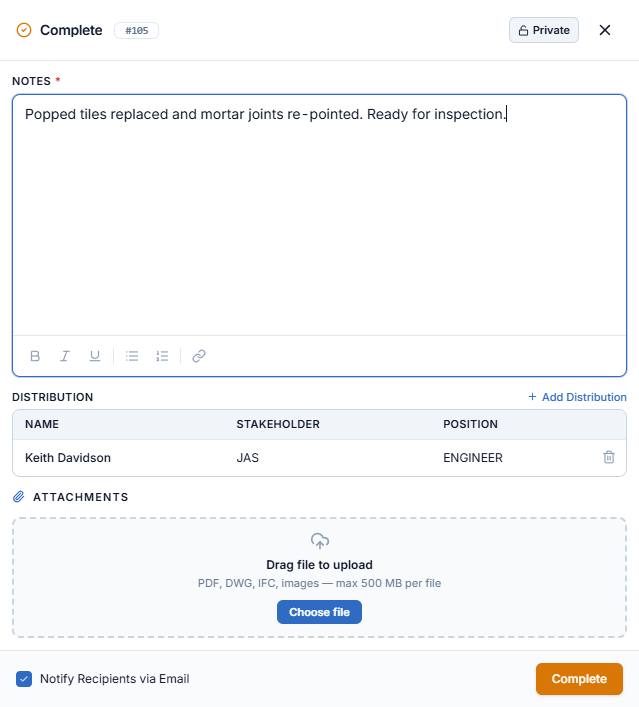
Open the issue and click Complete (amber) on the action bar.
-
Enter the Note (required) describing the work done.
-
(Optional) Add recipients or attach files.
-
Click the confirm button. The status moves to Done.
The Resolver recorded on the issue is the user who actually performs the Complete (or a direct Close) — which may be the assignee, a member of the assignee's group, the creator, or an administrator. It is not automatically the assignee.
Close an issue
-
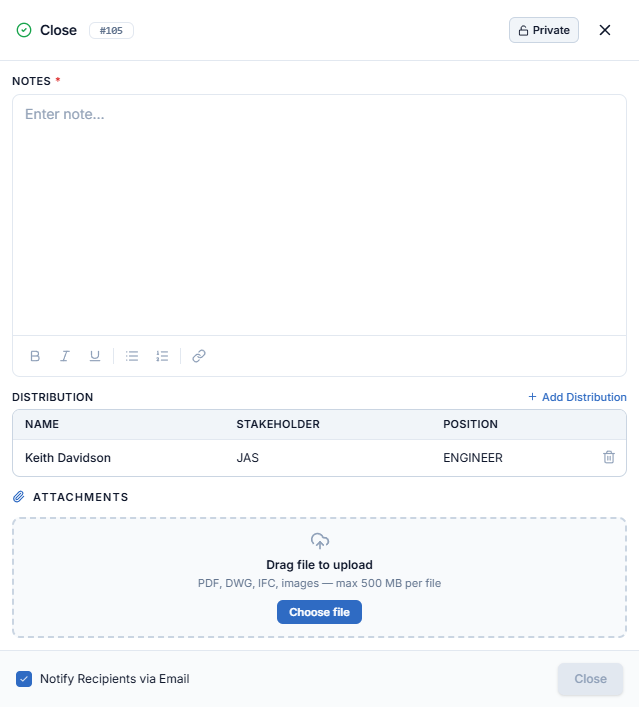
As the creator (or an administrator), open the issue and click Close (green).
-
Enter the Note (required) and confirm.
-
The status moves to Closed and the closed date is recorded.
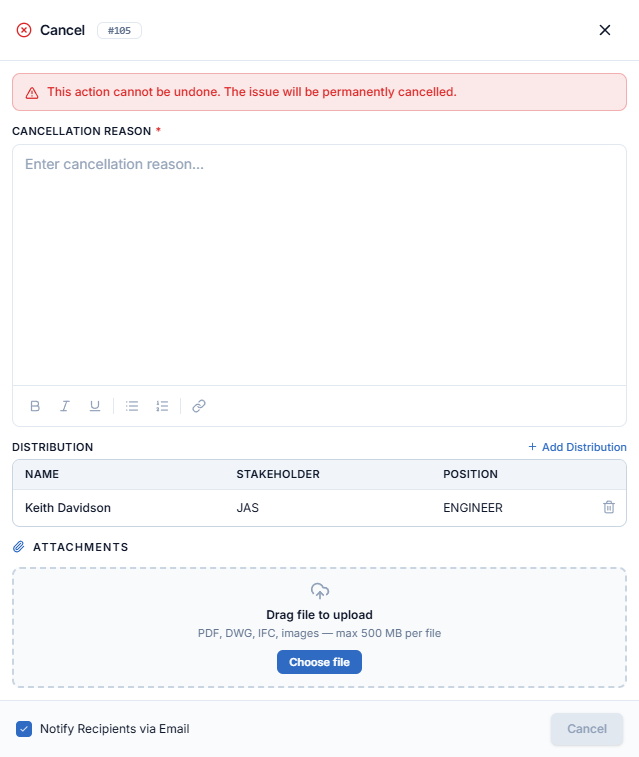
Cancel an issue
-
Open the issue, open the More menu, and choose Cancel.
-
A red warning banner reminds you that this cannot be undone.
-
Enter the Cancellation reason (required) and confirm.
-
The status moves to Cancelled — a terminal status. The only way out is the creator's Reopen action.
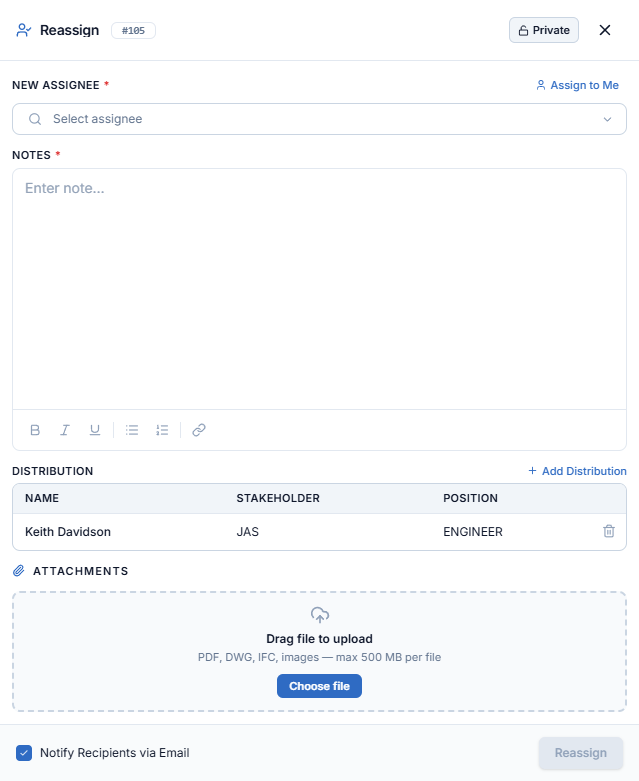
Reassign an issue
-
Open the issue, open the More menu, and choose Reassign.
-
Select the new assignee (required) — or use Assign to Me.
-
Enter the Note (required) and confirm.
-
The assignee changes and the action menu refreshes for the new assignee. The previous assignee is automatically kept in the distribution list so they keep receiving notifications.
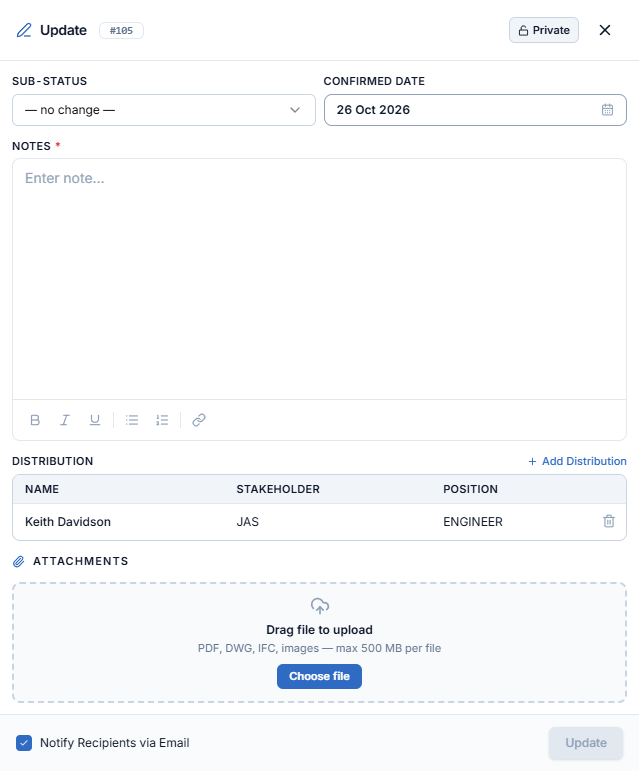
Update progress
-
Open the issue, open the More menu, and choose Update.
-
(Optional) Set a Sub-status (In-Progress / Pending) and/or adjust the Confirmed Date.
-
Enter the Note (required) and confirm.
-
The main status is unchanged; the progress is recorded in the Activity timeline.
Sub-statuses (In-Progress, Pending, …) serve the activity log only — they never appear as a separate column and are not a filter criterion.
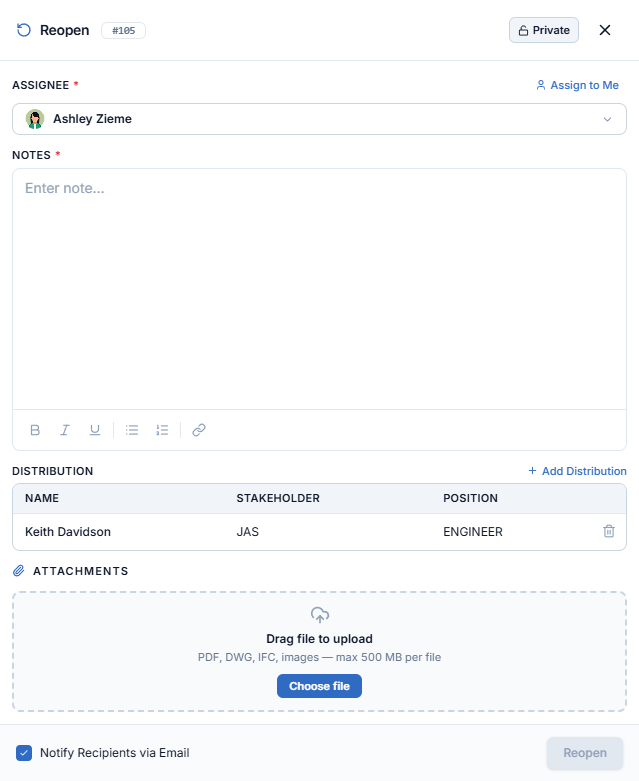
Reopen an issue
-
On a Done, Closed, or Cancelled issue, click Reopen (or find it in the More menu).
-
The assignee selector is pre-filled with the current assignee — keep it or pick someone else (Assign to Me available).
-
Enter the Note (required) and confirm.
-
The status moves to Reopened and the closed date is cleared.