Create an Issue on the Drawing
Raise a new issue straight from the drawing. The issue is created with its pin already placed at the spot you clicked.
Prerequisites: a project role with Issue write access.
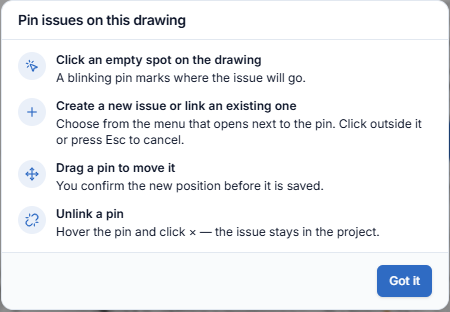
The viewer header reads "Click empty space to create or link an issue. Drag a pin to move it." Click the ⓘ How to pin issues button next to it for a four-step summary.
Steps
-
Open the DMap in the viewer and zoom to the area you want.
-
Click an empty spot on the drawing (not on an existing pin). A blinking pin marks the spot and a small menu opens:
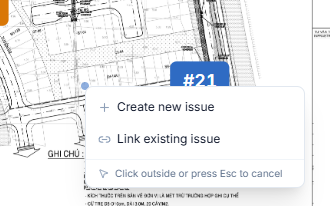
- Create new issue
- Link existing issue — see Link an Existing Issue
Click outside the menu or press Esc to cancel.
-
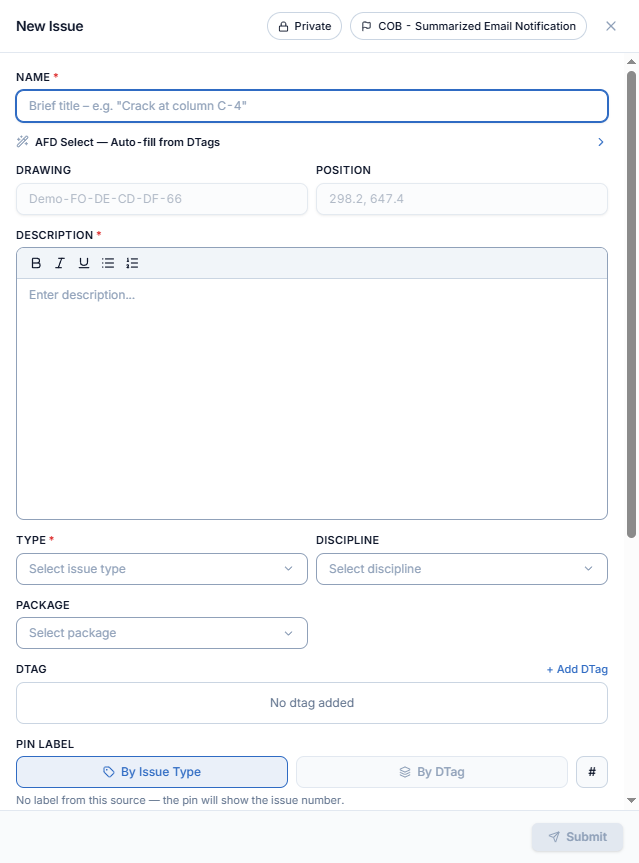
Click Create new issue. The New Issue panel slides in from the right. Drawing is pre-filled with the current DMap, and Position shows the coordinates of the spot you clicked. You cannot edit either.
-
Fill in the issue:
- Name (required) and Description (required, rich text).
- Type (required), Discipline, Package.
- DTag — click + Add DTag.
Fill Name, Description and DTag in one goClick AFD Select — Auto-fill from DTags under Name to pick defect values from the DTag tree. AECIS fills Name, Description and DTag for you. See Auto-Fill from DTags (AFD).
-
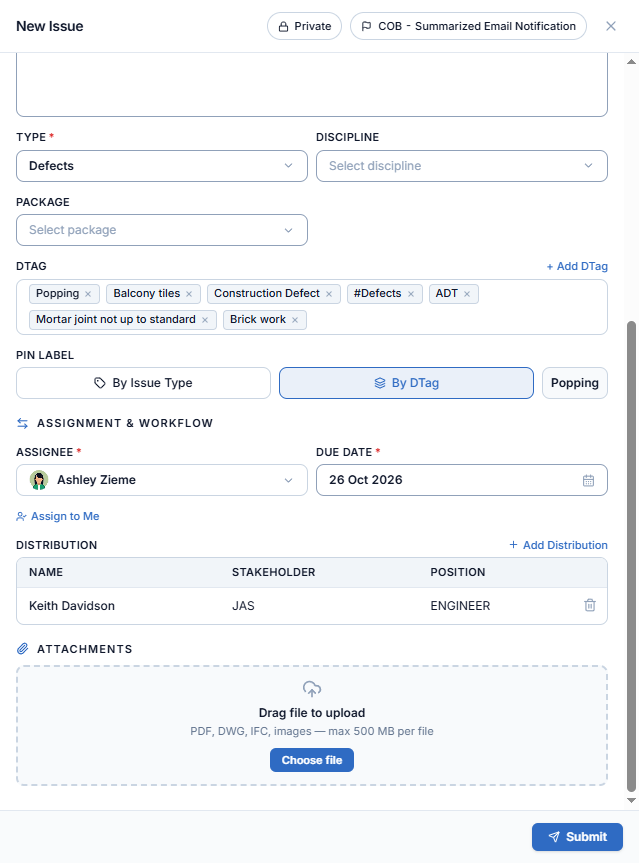
Choose where the Pin label comes from. The label is the short text shown on the pin in Label view:
Option Label source By Issue Type The issue type (e.g. DEFECTS)By DTag The DTag value of the issue (e.g. Popping)The box on the right previews the label. If the selected source has no value, it shows # and the panel says "No label from this source — the pin will show the issue number."
-
Under Assignment & Workflow, set:
- Assignee (required). Click Assign to Me to pick yourself.
- Due Date (required).
- Distribution, the people who get email notifications. The project's default recipients are already added.
- Attachments (optional). Accepted: PDF, DWG, IFC and images, max 500 MB per file.
-
(Optional) Toggle Private or COB – Summarized Email Notification at the top of the panel. These work the same as in the Issue module.
-
Click Submit.
What happens next
-
A toast confirms "Issue created". The issue is created in the Issue module, and its pin appears on the drawing at the clicked spot.
-
In Label view the pin shows the label as a short code. In the example below the new issue's pin shows
PP(from Popping), while the other pins show their issue numbers.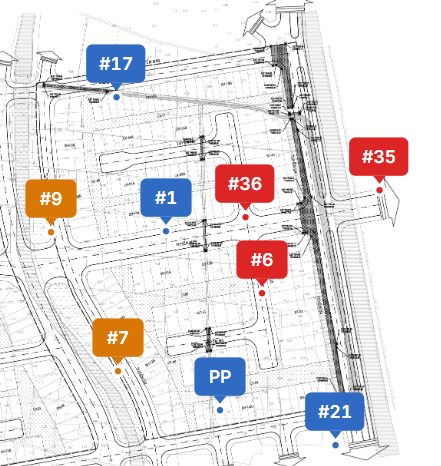
-
To change the label source later, open the issue from its pin: the detail panel has a Pin Label row.
-
The usual creation email goes to the assignee and the distribution list.
Closing the New Issue panel with × does not ask for confirmation and does not keep a draft. Submit before closing.